Metallica Hell Yes: Handwriting RISC-V Assembly for Fun and Profit

You probably won't make any money from handwriting RISC-V assembly, and if you're like me and don't have a brain you won't profit by learning much either. You can't benefit from a brain stretcher if you don't have a brain to begin with. So why even bother doing this? B-b-because--
It's cool, that's why! Writing assembly by hand is fun, and instructive, and it will change your mental model of how computers work. By learning to reason at the register level, you'll gain a better, more intimate understanding of what computers are really doing when running your code. That understanding is the profit. And the fun! With that in mind, let's dive right in.
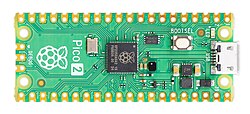
Our goal: to write a RISC-V version of John Conway's Game of Life and run it METAL on an LED matrix with a Raspberry Pi controller. The slice of Pi that we'll be using (pun, obviously, intended) is the Pi Pico H, that is, the Pico 2 with headers pre-installed. Headers are just these little spiky bits which you can attach peripherals to in order to enable GPIO and debugging. If you're buying a Pico and don't own or aren't comfortable using a soldering gun, make sure you get one with the headers pre-installed-- it will save you the trouble of soldering them on yourself. (They do make solderless 'hammer-in' headers which you could buy separately and the install yourself, but it's a lot simpler to just buy one with headers ready as-is.) A Waveshare 64 x 32 LED matrix is the display we're going to target. It's this model. You'll also need these for powering the matrix
The RP2350, which is the actual microprocessor on the Pico 2 board, doesn't have 4 physically separate, independent cores. Instead, it has a 'redundant core architecture', where dual ISA implementations are physically present in the same positions on the die. This is different from most multicore chips, which typically give each core its own separate, physical silicon implementation. On this chip, both ISAs-- the ARM Cortex M-33 and Hazard3 RISC-V-- are physically there in the silicon, but because they share the same die positions, only one can run at any given time. Otherwise, the chip would have to manage both on shared IO and communication (serial bus) infrastructure. Which ISA gets activated is determined at boottime, when the bootrom reads a startup flag, IMAGE_DEF_BLOCK, reads the architecture that the programmer declared, and then activates that ISA on both cores.
When you first plug the Pico 2 into your computer, that bootrom is the first thing that loads. After reading IMAGE_DEF_BLOCK, reading the architecture specified there, and loading it, you're now running in machine-mode, M-mode, which is the first mode that's entered on system load or reset and operates exclusively on physical addresses. In U- (user) and S- (supervisor) modes, running code is assigned virtual addresses, which the memory management unit (MMU) translates to actual physical addresses through a process known, creatively, as Virtual Address Translation. According to the RISC-V documentation, "M-mode is used for low-level access to a hardware platform." Which is great for us since that's exactly what we need.

At this point, only core 0 is active. The only running clock is the default Ring Oscillator, or ROSC. During normal operation, a microprocessor is driven by a quartz crystal. A voltage is applied to the crystal and filtered to produce a stable signal that acts as the pulse of the chip. This works, incidentally, because of the piezoelectric effect which converts electrical energy to physical vibrations. When the chip powers on, though, this external crystal isn't running, so the ROSC is needed to drive start-up. The bootrom will switch to the external crystal as soon as it detects one.
There's some rigmarole involved in toolchain setup. If you feel like skipping all that, you can just clone this repo, delete the finished assembly files, and use the existing toolchain. Because we need to run our code on a separate device, there's a final flash step, where we port the machine code (an ELF file) onto the Pico. Before we can do that, we have to convert it into a bootable format, which in this case is Microsoft's uf2, or USB Flashing Format. With this, we can just drag and drop the file onto the RP2350. The flow, as you can see in the provided Makefile, is .s -> .ld -> .elf -> .uf2. The repo contains a file "preflight checklist.md" that lists all the toolchain dependencies you'll need to install. At this point, you should go make sure you have all the stuff in that file.
Once you've emerged from the depths of hell, you're ready to begin writing assembly. :) The first thing we need to do is define stack regions for both cores by setting stack pointers. That will involve setting a stack pointer on the first core, then syn